
How to Make a Portable Bootable USB Toolkit for Emergencies
Have you ever faced that heart sinking moment when your computer refuses to start right before an important deadline or maybe your cousin shows up with the classic line,
“Yaar my laptop is not booting. Can you check it once?”
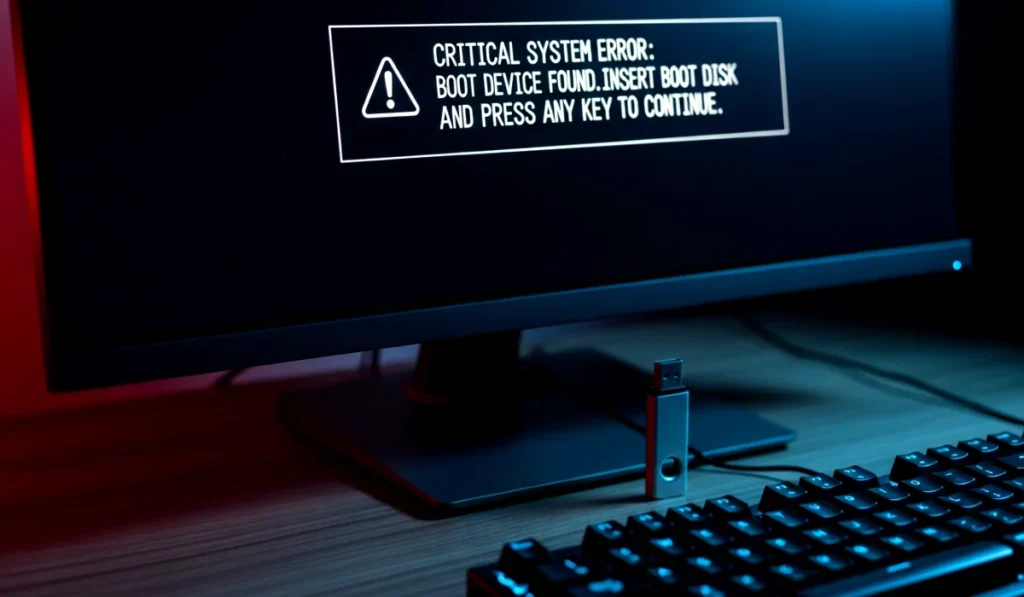
If you have been there, you know how helpless it feels. I remember sitting in front of my old Dell laptop years ago, staring at a pitch black screen, wishing it would magically turn on. That day I learned a simple truth. Having a portable bootable USB toolkit for emergencies is not a luxury. It is a lifesaver.
Now let’s talk about how you can create one that works every single time.
This guide will walk you through everything. I will show you what to include, which tools are worth adding, the safest way to create it, and how to use it confidently even if you are a beginner.
Welcome to your new superpower.
Why You Need a Portable Bootable USB Toolkit
Let’s start with the obvious question. Why bother making an emergency USB toolkit when most people rely on built in repair options or online help?
Because real emergencies rarely come with warnings.
Imagine these situations:
- Your system refuses to boot after a Windows update
- Your laptop gets hit by malware and the desktop never loads
- Your hard drive becomes corrupted and the OS fails
- You need to reset passwords that you forgot
- You want to backup your files but the OS is dead
- You are trying to help a friend who has no idea what is wrong
Your portable bootable USB toolkit gives you a way to repair, recover, diagnose, reset, scan, clone, partition, and even reinstall systems without depending on the computer’s internal OS.
It is basically a Swiss Army Knife of tech emergencies.
I often call it my digital first aid box. Just like a real first aid kit helps during sudden injuries, this USB toolkit helps during sudden computer injuries. And once you create it, it will serve you for years.
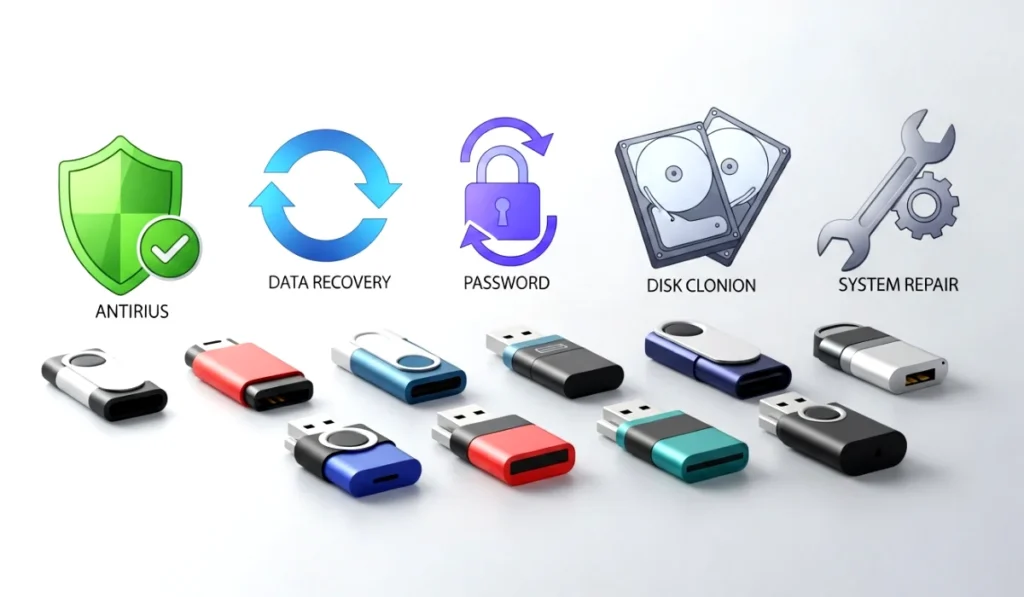
What You Should Include in Your Emergency USB Toolkit
Here comes the fun part. Before we build it, we need to decide what goes inside.
A good portable bootable USB toolkit for emergencies should have tools for:
- System repair
- Virus removal
- Hard drive testing
- Memory diagnostics
- Password recovery
- Data backup
- Disk cloning
- OS installation
Let me break this down into easy categories.
1. A Live Operating System
A live OS boots directly from USB. You can use it even if your laptop OS is completely dead.
Popular choices:
- Hiren’s BootCD PE
- Medicat USB
- Ubuntu Live
- Windows 10 or 11 PE
A live OS lets you browse files, connect to WiFi, scan for malware, and fix issues just like a normal desktop.
2. Disk Partition and Recovery Tools
Your hard drive is the heart of your computer. Keep tools like:
- AOMEI Partition Assistant
- GParted
- EaseUS Data Recovery
- TestDisk
These help when drives become corrupted or partitions disappear.
3. Antivirus and Malware Removal Tools
Some of the best portable scanners include:
- Malwarebytes portable
- ESET Online Scanner
- Kaspersky Rescue Disk
You can clean infections without entering the infected OS.
4. Backup and Cloning Tools
For saving important data before repairs:
- Macrium Reflect
- Clonezilla
- Acronis True Image
Cloning helps you move from one drive to another without reinstalling everything.
5. Password Reset Tools
Forgot your Windows login? It happens more than you think.
- NT Password Editor
- PCUnlocker
- Lazesoft Recovery Suite
These can reset passwords even on locked systems.
You can also read : Developers Are Secretly Using These 10 VS Code Extensions To Work Faster Than Ever
6. Hardware Diagnostics Tools
For checking RAM, CPU, and storage health:
- MemTest86
- CrystalDiskInfo
- CPU Z
- HWMonitor
These help you identify heating issues, faulty memory, or dying hard drives.
Once you pack your USB with these items, you have a complete emergency toolbox that works in almost any situation.
How to Choose the Right USB Drive
Your toolkit is only as reliable as the USB you use.
Here is what to consider.
1. Storage Capacity
For a powerful toolkit, use at least 32GB.
If you want multiple live systems or OS installers, go for 64GB or 128GB.
2. USB Type
Use USB 3.0 or 3.1 so everything works faster.
Avoid very old USB 2.0 drives unless you enjoy slow processing.
3. Brand Quality
Choose trusted brands like:
- SanDisk
- Kingston
- Samsung
- Corsair
Cheap drives fail when you need them most. A little investment today saves a lot of stress tomorrow.
4. Speed
Look for 100 MB per second or more read speed. Faster USB means faster booting and scanning.
Step by Step Guide to Creating a Bootable USB Toolkit
Alright, now let’s build your own portable bootable USB toolkit for emergencies step by step.
Grab a cup of coffee and follow along.
Step 1. Download Ventoy
Ventoy is one of the easiest tools for creating multi boot USB drives.
Search for Ventoy online and download the installer.
It works on Windows, macOS, and Linux.
Why I love Ventoy:
- You can put multiple ISO files without formatting again
- You simply copy ISOs like normal files
- It supports almost every rescue tool
- It is fast and beginner friendly
Step 2. Install Ventoy on the USB
Open Ventoy2Disk
Select your USB drive
Click Install
Your USB will be formatted, so save your files before this step.
After installation, your USB becomes Ventoy enabled.
Step 3. Download the ISOs You Want
Now download the tools you selected earlier. Suggestions:
- Hiren’s BootCD PE ISO
- Ubuntu Live ISO
- Windows PE ISO
- Kaspersky Rescue Disk ISO
- Medicat ISO
- Clonezilla ISO
- MemTest86 ISO
Choose the ones you want. You do not need everything. Even 2 or 3 can cover most emergencies.
Step 4. Copy the ISO Files to the USB
Once downloaded, simply drag and drop the ISO files onto your Ventoy USB.
No complicated steps. No extra setup.
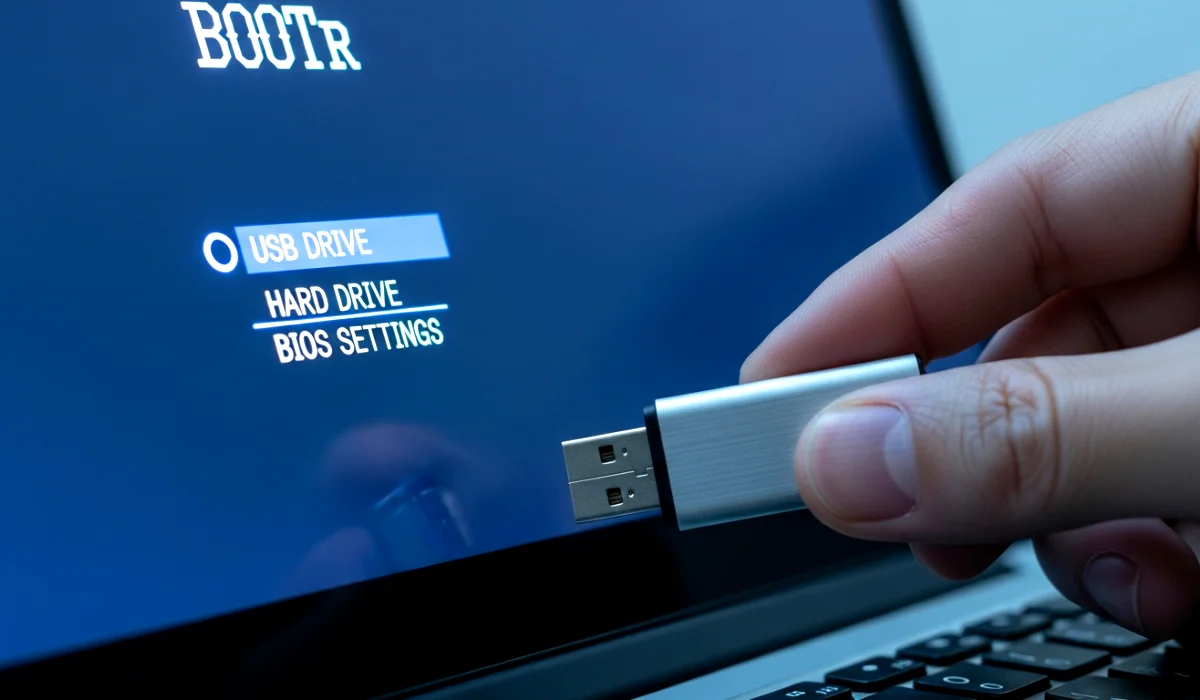
Step 5. Boot Your Computer Using the USB
Restart your computer
Press the boot key (usually F12, F9, Esc, F2)
Choose USB from the boot menu
You will now see the Ventoy menu that displays all your tools.
Select any tool and it will boot instantly.
Congratulations.
Your emergency USB toolkit is officially ready.
Tools You Can Add for Recovery and Repair
Let’s talk about some optional but powerful tools you can include.
1. Windows Installation ISO
If you help others or reinstall Windows often, this is handy.
2. Linux Rescue Distros
Great for advanced users.
3. Cybersecurity Tools
For ethical testing only.
4. BIOS Update Tools
If you know what you are doing, these can revive dead systems.
5. Portable Apps Folder
Add a folder with:
- Chrome portable
- Notepad Plus Plus
- WinRAR portable
- CPU Z
- CCleaner portable
These run directly from the USB even in live OS mode.
Tips to Keep Your USB Toolkit Ready
A toolkit is useful only when updated.
Here are some easy maintenance tips:
- Replace ISOs every 6 to 12 months
- Test your USB every month by booting it once
- Keep a backup of your ISO files on your computer
- Avoid unplugging the USB while it is in use
- Do not store random files on it to avoid confusion
- Store the USB in a safe place instead of letting it roll around in your bag
One simple habit I follow is marking the USB with a red sticker. That way, I never confuse it with normal flash drives.
Final Thoughts on Making a Portable Bootable USB Toolkit for Emergencies
A portable bootable USB toolkit for emergencies is something every tech user should have. It is not only for experts. Even beginners can use it with a little practice.
Once you create this small toolkit, you gain control during the worst computer problems. No more panic. No more feeling powerless. You will be the person others come to when their laptop crashes at the wrong time.
So here is my challenge for you.
Take 20 minutes today. Create your USB. Test it once.
And sleep peacefully knowing you are prepared for any tech emergency.


One Comment